Showing posts with label Recipe. Show all posts

Monday, April 30, 2012

pretzel memories

I did something last week that I've been wanting to do for a long time...
I made soft pretzels with the kids...

Yep...I'm Martha...
totally 100% Martha...
...
only that's a lie...
I'm not...
...we just have to remember the cake pop incident of '12 to know I'm not Martha!

the reason I have never made them before is because I was scared...
it's bread...which equals yeast...and that's always a little iffy...
it's rolling and shaping of the dough...with children involved...
you have to boil them in a brine...
yes...a brine...
....that's freaky!
and then the egg wash
and all with kids...

yep...no, thanks I'll pass...

but I really wanted to...

I kept pinning soft pretzel recipes...
I would read them and re-read them...
even though they look scary with the whole brine thingy...
they also looked very easy....
but then I would remember the cake pop incident of '12 and then remind myself that just because the other bloggers think it's easy doesn't mean it is easy!

Well I did it...
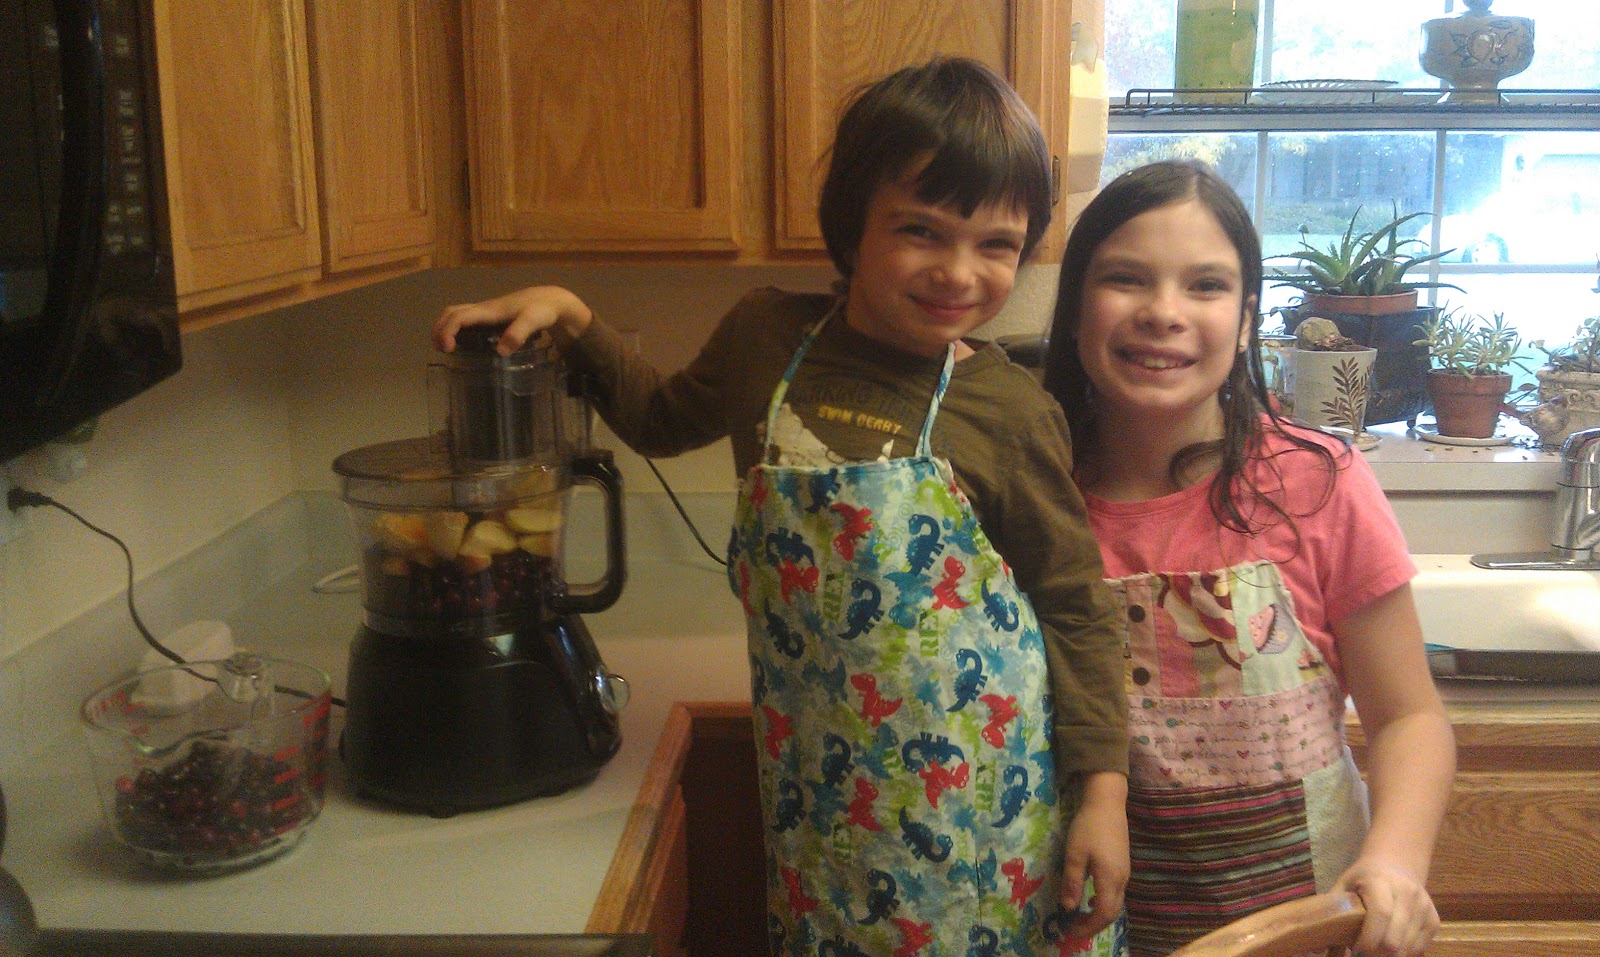
I took the leap and made pretzels with the kids...
I followed this recipe from Alton Brown/Food Network
(my slightly altered recipe posted below)
it was great...
the dough...super simple...

the creating pretzel shapes with the kids...fun..not super easy...but fun
AND the dough is very forgiving, and even though the boy child played created with his dough for a LONG time it wasn't any worse for the wear, I couldn't even tell which 2 were his over-loved creations when they came out of the oven.

the scary brine...easy peasy!

egg wash...no biggie...just a small simple step
and the kids...
they LOVED it...loved it so much we did it three days in a row!
yes...THREE days in a row...
day one...loved them but only had table salt and that was too much salt..
day 2...I got the right salt...but Beau made the dough and I didn't tell him the right amount of butter (Alton's recipes is in oz not tablespoons)...so it was a bit too rubbery of dough for the knots so we opted for bites instead-AMAZING...
day 3...cinnamon pretzels for breakfast-yes please!

Homemade Soft Pretzels
1 1/2 cups warm (110 to 115 degrees F) water
1 tablespoon sugar
2 teaspoons kosher salt
2 1/4 teaspoon yeast (1 package active dry yeast)
4 1/2 cups flour
4 tablespoons butter, melted
Pam (the baking spray...not the lady) for spraying
10 cups water
2/3 cup baking soda
1 large egg yolk beaten with 1 tablespoon water
2 tablespoons melted butter
Pretzel salt or Cinnamon & Sugar

Directions
Combine the water, sugar and kosher salt in the bowl of a stand mixer and sprinkle the yeast on top. Allow to sit for 5 minutes or until the mixture begins to foam.
Add the flour and butter and, using the dough hook attachment, mix on low speed until well combined.
side note...I was summoned to the back yard at this point to see the snake that the boy child had found...and I left the mixer going...I have no idea how long I was gone... I came back and the dough was smooth and pulling away from the side of the bowl...so I never upped it to medium speed...
Change to medium speed and knead until the dough is smooth and pulls away from the side of the bowl, approximately 4 to 5 minutes.
Remove the dough from the bowl, clean the bowl and then spray with Pam (the spray...not the lady). Return the dough to the bowl, cover with plastic wrap and sit in a warm place for approximately 50 to 55 minutes or until the dough has doubled in size.

Preheat the oven to 450 degrees F. Line 2 cookie sheets with parchment paper and spray with Pam...the spray not the lady!

Bring the 10 cups of water and the baking soda to a rolling boil in an 8-quart saucepan or roasting pan.

In the meantime, turn the dough out onto a slightly oiled work surface (I just sprayed the counter and let the kids go to town) and divide into 8 equal pieces. Roll out each piece of dough into a 24-inch rope. Make a U-shape with the rope, holding the ends of the rope, cross them over each other and press onto the bottom of the U in order to form the shape of a pretzel...or skip the knot and make pretzel bites by cutting them into 1-2 inch squares (we did bites the 2nd time we made these...just as yummy!).  Place onto the parchment-lined pan...(or spray the bee-jeezus out of the pan...DO NOT opt for wax paper...just sayin')

Place the pretzels into the boiling water, 1 or 2 at a time (for bites I would say between 10-15), for 30 seconds. Remove them from the water using a large flat spatula. Return to cookie sheet, brush the top of each pretzel with the beaten egg yolk and water mixture, if topping with Pretzel Salt (Course Sea Salt...not table salt, if you don't have pretzel salt skip the salt...and take my word for it that table salt was TOO much!) sprinkle it now. Bake until dark golden brown in color, approximately 10 minutes. Transfer to a cooling rack for at about 5 minutes.

For Cinnamon & Sugar Pretzels:  Wait 2-5 minutes for pretzels to not be too hot, brush the tops of warm pretzels with melted butter and turn upside down/butter side down into a bowl with bowls with cinnamon & sugar

Devour Eat pretzels while still warm...and enjoy with the family!
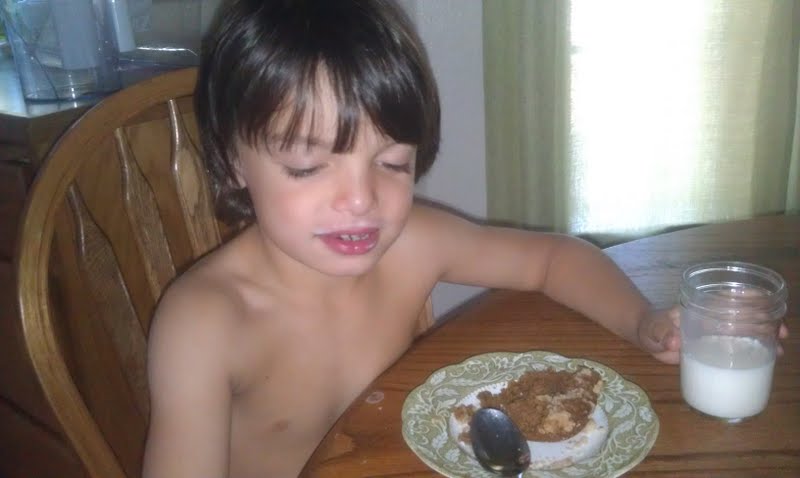
this is the pictures you get when you ask your husband nicely
 to snap a picture of the kids enjoying their pretzels!
Sorry for the lack of pictures of all the steps...I was enjoying the pretzel moment with my kids and didn't stop and take pictures along the way!

Have you ever made homemade soft pretzels?
How about bagels...I think bagels are next on my list!...

Thursday, April 12, 2012

buttermilk pie

...if you're from the south I'm sure you've heard of a Buttermilk Pie...
or at least all my internet investigation of buttermilk pie has led me to believe that it's a staple dessert for all holidays in the south...but if you're like me...
west coast girl all the way
I've never lived more than 100 miles from the Pacific Ocean...
... (I just googled that...I looked up all 3 cites...yes a whoppin' 3 cities and measured how far they were from the Pacific...as a crow flies...& it's probably more like 90 miles, but it didn't sound as good)...
...than you may have never heard about this thing called the Buttermilk Pie...


I just discovered it last week...
while I was standing in the checkout at Wal-Mart...
...at the first of the month (stupid me)
so I picked up some recipe magazine to help wait out the next 45 minutes of my life...
and I stumbled upon an article about traditional Easter menu's
(I have NO idea what magazine I was flipping through)
and there is was this beautifully simple pie...
just looking right at me...
it had this beautiful golden crust with this golden filling
...not 100% a custard filling
...not 100% a cream filling
just a pretty golden filling...
source Aunts Ruthie's SugarPie Farmhouse
source Food Network
anyways...

Wednesday, November 23, 2011

the bitter sweet

cranberry relish....
this is way better than any ol' canned cranberry jelly goop...
   ...what is that stuff anyways?

this has becoming a new tradition in our family...
it's a recipe from my sister-in-law's grandmother...
...my husband's, brother's wife....
she shared it with us a few years back
(can't remember now, but maybe 5 years ago?)
my mom made the recipe last year
and this is the first year I've made it...
so yummy...and so easy...
actually I should say the kids made it this year...
I was only in the kitchen for parts of the process
....the big knife process
...and the taking pictures process
girl child cutting and coring the apple
boy child peeling the orange
big knife sitting just haphazardly in the mix!

and this recipe is so simple that I actually walked them thru the recipe from the other room while I folded clothes!
lets pretend that I didn't just yell at them to stop yelling at each other

Grandma Grace Carlson's Cranberry Relish
Prepare at least 2-3 days before using so ingredients blend
1 pkg. cranberries
1 orange, peeled and seeded
1 lemon, peeled and seeded
1 apple, cut and cored, no need to peel
1 16 oz. can crushed pineapple
     (I had a 20 oz can, that I just measured out 16 oz/approx 2 cups)
1 cup sugar

Wash cranberries in colander.  Grind first four ingredients; cranberries, orange, lemon, apple. (Grandma used a meat grinder; food processor is best next option, and probably safer if your leaving the kids unsupervised your letting your kids make the recipe...). Add pineapple, with it's juice, and the sugar to the ground fruit. Let stand 1-2 hours and taste. Add more sugar if needed but keep it fairly tart.
Relish will sweeten some as it stands for a few days.
It will also darken, I was worried, I remembered it being darker, and when the kids were finished it was a pale pink, I think all the air bubbles from the food processing...it darkened up pretty fast, like within an hour...

I doubled the recipe because I think it's a nice gift to 'bottle' up and hand out to friends
lots of cranberry relish
 there was one other sm jar already gifted to the piano teacher

if you give as a gift remind them that this needs to be refrigerated.... 

Wednesday, October 26, 2011

Bluster Busting Beef Stew

Yesterday was a blustery day....
a good ol' tie down the patio furniture windy day!
and yep, mother-of-the-year...
I checked the weather on Google like every good mother does before her kids pick out their clothes for school...
it 'said' 70...
pretty yellow sun, shiny all bright, no clouds
so I told them to pick out shorts and tee's...
this is where the mother-of-the-year part comes...
I just glanced at Google...didn't really study it...
and I wasn't looking at the weather for Redding...
I was looking at the weather for Kelseyville (where the in-laws live)
Redding did have the pretty sun...
but also the note of '25 mph winds'....

yeah, so um....it didn't feel like 70...poor freezing kids
to redeem my mother-of-the-year award I decided to make a cozy dinner
made-in-the-bread-machine 'homemade' bread with soak-your-bread-in-the-broth-stew...

Beef Stew recipes are all over the web...I have 'pinned' a few on pintrest
source Brown Eyed Baker
I looked over a few recipes online and in my own cookbooks...and not wanting to run to the store for anything...this is what I came up with a combo of all the recipes I looked at and what was in my fridge and pantry...

Blustey Day Beef Stew
1-1 1/2  lbs. beef chuck roast, trimmed and cut into 1 1/2 in. cubes ( I look for it on sale already cubed)
Salt and ground pepper
1-2 tsp Worcestershire sauce
1 tablespoon vegetable oil
1/4 teaspoon salt
1 medium onion, chopped (about 1 cup)
3-4 stalks of celery chopped, including leaves
1 medium garlic cloves, chopped or grated
3 tablespoons  flour
5 cups beef broth, divided (or 5 cups warm water and 5 tsp beef bullion)
2 teaspoons red wine vinegar
2 bay leaves
1 teaspoon dried thyme
4 medium  potatoes, washed and cut into 1-in. cubes (don't peel...more vitamins)
6-8 carrots (about 1 lb.), peeled and sliced 1/4 in. thick

Dry beef with paper towel and season generously with salt and pepper. Heat 1 tablespoon oil in heavy-bottomed pot over medium high heat and brown beef with Worcestershire sauce, about 8 min.

Remove beef and add onions, celery, and 1/4 tsp salt and cook, scraping bottom of pan for brown bits until softened (about 5 mins). Add garlic and continue to cook for 30 sec. Stir in the flour and cook until lightly colored (1-2 min.). Add 1 cup of broth and vinegar, scraping the bottom and stiring until thick and flour is dissolved.
Gradually add the remaining beef broth, stirring constantly, scraping up the remaining browned bits on bottom of pan. Add bay leaves and thyme and return to simmer. Add beef, return to simmer, reduce heat to med-low, and cover. Simmer for 25 min.
Add potatoes and carrots, leave uncovered, increase heat to medium and cook for additional 30-45 min

if you like a thicker stew this is when you would add a mixture of 1/4 cup broth and 1 tablespoon flour (stir together before adding to stew, and slow stir into stew...I like brothy stew...so I didn't do this.

Also I HATE dislike peas (the one veggie I don't like, I even like Brussels sprouts....), but you can add a bag of frozen peas at the end, just rinse them in water, drain and put in stew the last 5-10 minutes

Discard bay leaves (or not, we always said the person that ended up with the bay leaf was exempt from dishes...and then it only ever worked for my dad for some reason!), adjust seasoning and serve with warm bread.
..
We had enough left over to bag and freeze
Yea for easy dinner some day next week...or month (I guess next month is next week!)

Monday, October 17, 2011

Sometimes you feel like a dumpling

One rainy week and I was in soup mode...too bad the 80 degrees and sun came back...
okay, not complaining too much about the weather, I love this fall weather it is the best...but I got soup on the brain and now it's warm again...

found this recipe last week when I wanted chicken and dumplings, and since I've only ever made biscuit type dumplings I decided to give it a try.  Everyone like them, I LOVED them, and ate it for lunch for the rest of the week!...but the rest of family voted that dumplings were meant to be in the form of biscuit not cornbread...they did like it just they want 'regular' dumplings next time...we'll see!

Chicken & Cheesy Cornbread Dumplin's
1 Tbs butter
1/2 cup chopped onion
2-3 stalks of celery
3 cups chicken broth
2-4 carrots peeled and sliced
1 cup frozen corn or peas
2 tsp fresh basil or 1/2 tsp dried basil
1/2 tsp salt
dash of garlic powder
dash of pepper
1 cup milk
1/2 cup flour
2 + cups cooked chicken, cubed
1 recipe cornmeal dumplings (follows)

In large saucepan saute butter, onion and celery until tender, add chicken broth, carrots and corn/peas and dried basil (add the fresh basil later if using), salt, garlic powder and pepper.  Bring to boil.

In small bowl mix together milk and flour.  Stir into veggie mixture, stir in chicken.  Cook and stir until thicked and bubbly, stir in fresh basil if using.

Meanwhile make cornmeal dumplings.

Drop dumpling dough by rounded tablespoon into bubbling stew, about 8.  Cover and simmer  over low heat for 10-12 minutes.

Cheesy Cornmeal Dumplin's
1/2 cup flour
1/2-3/4 cup shredded cheddar cheese
1/3 cup cornmeal
2 tsp sugar (optional) (original recipe didn't call for sugar, but we are a sweet cornbread family)
1 tsp baking powder
1/4 tsp garlic powder
dash of pepper
1 beaten egg
2 Tbl milk
2 Tbl oil

Combine flour, cheese, cornmeal, sugar, baking powder, garlic & pepper.  Stir in egg, milk and oil with fork until just combined.

enjoy...let me know if you prefer regular biscuit dumplings or cheesy cornbread dumplings...

Saturday, September 3, 2011

we shall have cake for breakfast


 but it's practically like veggie oatmeal, so it's good...right...right?

so I had a huge zucchini from a friends garden...
and I needed to use it since it's been hanging out on my counter for about 2 weeks now...and then I was thinking I can make a nice healthy breakfast for me and the boy child...
...girl child spent the night at a friends house...
...Beau is still in bed....

when I'm making cake for breakfast I like to make it whole wheat so I feel better about feeding it to my kids...so this is what I do....
ready...major news break here...
when the recipe calls for 1 1/2 cups flour...
...I use 1 1/2 cups whole wheat flour...
crazy amazing, I know...

blog tangent...as I was standing in my kitchen making cake breakfast I looked up at my cupboard and decided to share with you my beautifully organized life....

and then because I'm real...I decided I'd show you the other side of the same life...
blog tangent over...

and here is the recipe for the veggie oatmeal otherwise know as Oatmeal Zucc Coffee Cake....

Oatmeal Zucc Coffee Cake
1 1/2 c. whole wheat flour
1 1/4 c. oatmeal
1 c. brown sugar
1 tsp. soda
1 tsp. cinnamon
1/4 tsp. nutmeg
1/2 tsp. salt
2 eggs
1/4 c. dairy sour cream
2 c. shredded zucchini
1/2 c. butter, softened
2 tsp. vanilla


crumb topping
3/4 c. sugar
1/2 c. oatmeal
1/2 c. flour
1/4 c. softened butter
1/2 tsp. cinnamon
1/4 cup chopped pecans (optional)

Heat oven to 350 degrees. Grease and flour 9 x 13 inch pan. Combine all coffeecake ingredients at low speed. Put in pan.

Mix topping ingredients minus the pecans until crumbly. Sprinkle 1/2 of crumbs over 1/2 of cake...mix pecans into rest of crumb topping and sprinkle over rest of cake.
(my family doesn't appreciate the gift of nuts in desserts breakfast foods)

Bake at 350 degrees for 30 to 40 minutes or until toothpick inserted in center comes out clean.


Cut into squares. Serve warm with coffee...or milk


Friday, August 12, 2011

priceless moments

the kids and I hit the farmers market last Saturday...
Beau was going to the library sale and he likes to wait in line....
and well, 
well, the crew that shows up early and waits for the library sale is a very interesting mix of people...
so rather than wait around and people watch 
(it is a good group to people watch with, but maybe not with the kids in tow)...
anyways, rather than wait the kids and I walked over to the farmers market...
I wanted some peaches and some honey...
got both, and the peaches were gone by Sunday afternoon...

yeah, I know, I take amazing pictures...don't be jealous!
so back to the farmers market for us on Tuesday morning...
I wanted  needed to make a peach cobbler...
arrived at the market around 11 and the peaches were almost all gone, I asked for 10 lbs because some ladies at the office wanted some too...and some for eating...
it was the last pickin's of the day and she sold me her last 10 lbs,
& they were all seconds and needed to be used that day...
took all 10 lbs to the office
only got rid of maybe 2.5 of the 10 lbs
& I was left with just less than 8 lbs of peaches...
that needed to be uses asap...
so I set to work peeling those little guys...
and before I knew it I had a helper...
the girl child came it,
donned her apron
found a knife
and asked me how she could help...
before I knew it she had taken over all the peaches and I had moved onto making the 'cobbler' part...
it was great working together with my girl..
she peeling and slicing peaches, me mixing up the cobbler...
talking about girl stuff....
laughing...
and then cleaning up the mess of peach juice all over the floor and counters...
and then enjoying the girls first cobbler...
this was only 1 of the 2 cobblers we ended up with, the other went to our neighbors...
it was a bubbling, golden bit of heaven...
I love a good cobbler....
but a girls' first cobbler...that's just priceless...

Whole Wheat Peach Cobbler
peaches
6-8 peaches-peeled and sliced
1/2-1 cup sugar 
     (depending on the sweetness of the peaches, you may be able to cut this down to 1/4 cup)
2 Tbs cornstarch
2 tsp vanilla
cobbler
1 1/2cups whole wheat flour (or regular if you want)
1/2 cup oatmeal
1/2 cup sugar
1 tsp baking powder
1/2 tsp salt
1 cup butter
1/2 cup milk

pre-heat oven to 350
place peaches, 1/2 cup sugar, cornstarch, and vanilla into large saucepan, stir over med heat until mixture begins to boil, reduce heat and simmer for 10 minutes.

while peaches are cooking mix up cobbler,
mix all dry ingredients together, and then cut in butter.  once mixture is crumbly slowly add in milk.

pour peaches into a greased 13x9 inch pan and then drop spoonfuls of cobbler over top of peaches...
bake at 350 for 25-35 minutes until cobbler is golden and bubbling...

serve warm with vanilla ice cream and or whipped cream...

or for breakfast...
no judgement...
it's whole wheat, oats and peaches...that's a good breakfast...

and well it's better than doughnuts...

check out this amazing recipe book...
"New Recipes for Good Eating"...check out how happy the mom is feeding her kids the doughnuts she just fried in Crisco......

Tuesday, May 3, 2011

a Scone-ful week

So I had this idea last week that I'd do a few English sounding recipes because of the royal wedding and all...
and then I did none of them...because I won't post a recipe that I haven't actually made so since I never got around to making any of them I couldn't post them...
and by English recipes I mean scones...
and scones and a few more scones...

all that blabbering to say, that I finally got around to making these yummy scones yesterday for breakfast
and it's actually my own recipes because I totally tweaked the recipe I was following so much that it's nothing like the original!

oh, and if you've never made scones before, please do...
they are so easy to make and so worth it!
think sweet biscuit...
and if you've never made biscuits SHAME ON YOU!

nothing like a nice warm scone right out of the oven with your cup-o-Joe...
and I'm always amazing at how many scones my kids devour daintily eat for breakfast!
and hey, whole wheat, fruit (dried cranberries are a fruit right), dairy (yogurt)...that's a well rounded breakfast!


Cherry Vanilla Scones
1 cup dried cherries 
     or my cheater cheap version 
     1 cup cherry flavored dried cranberries
2 teaspoons vanilla*
1 cup whole wheat flour
1 cup white flour 
     (or go with 2 cups of whatever you have,
      I like to have some wheat so it seems healthier)
3 Tbl brown sugar (or raw, if your going the healthy route)
2 teaspoons baking powder
1/2 teaspoon salt
1/2 teaspoon baking soda
1/3 cup butter, cut into pieces
1 teaspoon orange or lemon lest
1 beaten egg yolk
1 cup vanilla yogurt
1 tea vanilla
1 recipe Vanilla Glaze, recipe follows
     (optional, I didn't make so you don't see it in the picture)

Place dried cherries (or cranberries) into small bowl, pour 2 teaspoons vanilla over the top and then pour enough boiling water over them to cover.  Let stand for 5 minutes and then drain well.

Meanwhile, in a large bowl combine flours, brown sugar, baking powder, salt, and baking soda.  Using a pastry blender cut in butter until mixture resembles coarse crumbs.  Toss in orange zest and drained cherries/cranberries; until coated. 

In a small bowl combine egg yolk, yogurt and vanilla.  Add mixture all at once to flour mixture, using a fork stir until combined.  Turn dough onto a lightly floured surface   Knead dough by folding and gently pressing dough for 10-12 strokes.  Pat into a 1 inch circle and either cut into 12 wedges or cut circles using a biscuit cutter.

Place scones onto an ungreased baking sheet, bake in a 400 oven for 7-9 minutes.

Vanilla Glaze
mix together 3/4 cup powder sugar and 1 tbl vanilla until you have  a drizzling consistency.

*Vanilla Tip...not sure if I've ever shared my tip for cheap good vanilla.  Buy it from a Mexican Grocery...I buy my big bottle for $8...Yep $8 for 33.7 oz of Really Mexican vanilla or $4 for 8 oz of imitation Safeway vanilla???
this little shopping secret allows me to use lots more vanilla which, in my opinion, is the key ingredient in many baking recipes!
don't have any idea where a Mexican Grocery is...either google it or look it up in the old fashion yellow pages, or talk to someone at your favorite Mexican restaurant...the Mexican store I go to is in the small shopping center as one of our favorite Mexican restaurants!

Monday, February 28, 2011

Gonna Roast Me a Chicken...or not!

oh, I do love a good oven roasted bird...and in the winter it's nice to have the oven on and the smells of cozy food floating about...
but sometimes you need to run an errand...
or you know that the chicken will need to go into the oven half way thru piano lessons/baseball games/doctor appointments all the way across town....

how, oh how, to have a nice Herb 'Roasted' Chicken on the table for dinner when you will be walking in the door just minutes before you plan to eat?

...maybe Herb-Crocked Chicken is better...
so many...maybe all...of our time honored roasting recipes can be easily turning into crock pot favorites....

this is any easy chicken and so nice on a cold winter day...
and also very doable for a roasting July day when the concept of turning of the oven is horrifying!

you can use dried or fresh herbs for this recipe...thinking I might plant a herb garden this year....

Herb-Crocked Chicken
1 3-3/12 lb whole chicken (you can also use breast or chicken pieces...)
2 Tbs butter-soften
2 cloves garlic-grated or minced
if using fresh herbs
1/2 cup chopped basil
1/4 cup chopped sage
1/4 cup chopped thyme
1/4 cup rosemary-stripped off the stem
if using dried herbs
1 tsp basil-crushed
1/2 tsp sage
1/2 tsp thyme
1/2 tsp rosemary
for both
1/2 tsp salt
1/3 tsp pepper or lemon pepper

veggies-optional...potatoes, carrots, celery

1.  Rinse inside of chicken and remove all the gross weird parts, and trim off any excess fatty skin or dangling things...Place breast side up into crock...Rub chicken with softened butter and then rub garlic over the top.
2.  In small bowl stir together herbs and seasonings, rub onto chicken and if using fresh herbs place 1/2 of mixture into the cavity of the bird.
found the package of 'Poultry Medley' herbs at the store and added some basil
you may want to pierce the chicken a few times so the flavors will get inside
3.  If using veggies place around the bird.  Cook/Roast/Crock (not sure of the terminology for the cooking in the crock) on high for 4 hours or low for 6-8 hours.
sure does look cozy in the crock
If you would like to check bird for done-ness uncover and place a meat thermometer into center of thigh (not touching a bone) and cover crock back up with lid or foil while the thermometer reaches the temp of 180. blog note...I had trouble with the meat thermometer take an accurate reading inside the crock, once I took the bird out and covered it to rest it read the right temp...
4.  Remove from crock, cover with foil and let bird rest for 10 minutes before carving.

to make a gravy
melt 1/4 cup butter in pan
whisk in  1/4 cup+ flour, salt and pepper until you have a ball
then slowly add the broth from the crock (about 2 cups)
cooking and stirring over medium heat, until you get the consistency and amount that you desire
if needed season with more salt and pepper.

our self-imposed-sometimes-vegetarian-because-meat-has-weird-textures daughter gobbled this up AND had seconds...

serve with whatever you want...
mashed potatoes or the potatoes and veggies you roasted with the chicken...
or a nice spinach salad and some bread
steamed broccoli or asparagus
potato or pasta salad....
baked potatoes...

have you 'roasted' a chicken in the crock pot before...did you use a time honored recipe or a newbie?

Sunday, February 13, 2011

Sunday Night 'Dinner'

Sunday Night is a hard night in the ChambersMade household....
Sundays are a long day for us with the whole family having to be out the door by 7:45 because of church and then not back home until around 1....and then a late lunch....and then well I just don't want to make dinner a few hours later...
we usually settle on something like 'Brinner' (Breakfast for dinner)...or leftover buffet...
well today the grandparents were in town...
and the kids stayed the night with them last night in their hotel....
spent the morning....and early afternoon with them...
and met us at the movies after church
     (for us, not for them...skippers!)
and ate popcorn and candy....after the kids had lunch at Costco with the g-parents....

so when we got home at 4:30 NO one was thinking dinner....

then by 7 a few of us starting thinking they might be hungry....
and I was thinking that if I wanted the kids to NOT wake up at 6 am STARVING to death I needed to send them to bed with SOMETHING in their tummies....

so the smoothie is what won for dinner....
and here is my amazing smoothie recipe....

some yogurt
some frozen fruit
some juice

blend....

so tonight's recipe used vanilla yogurt, strawberries and mango were the frozen fruit, and a strawberry/guava juice (something that was in concentrate and cheap!)....

so a little protein (yogurt), a lot of fruit, and a little sugar (juice)...and you have a wonderfully easy dinner...


and my picture...well, um...they were all gone by the time I remembered to take a pic....

and you can make these for valentines day and call them 'smoochies' ....

tons of other options for flavor combos....
strawberry and vanilla yogurt are a good base
and then the frozen fruit options and combos are endless (I just would steer clear of the frozen cherries...even without the pits...even with major blender time the girl child said that there were 'fruit scabs'...yeah NOT what you want in your smoothie!)
and the juice, whatever you think would be good, or what you have in your fridge/freezer...or skip the juice and use milk....

enjoy!

Friday, February 11, 2011

Eggs from the Farm

Farm Fresh Eggs...
Ranch Eggs
Eggs that Farmers eat...Ranchers...eat...

whatever it means...
Huevos Rancheros* are yummy!
my mom would make these for us every once in a while as a kid...
I always loved them...and now my kids like them too...
the husband, well lets not push it...he's not a big fan of the fried egg and bean combo...

I have been making these for breakfast on the weekends or for my lunch during the week when we have leftover taco meat and beans from a meal earlier in the week.

Huevos Rancheros
corn tortillas (just better with corn, I've tried flour, but don't like it as well)
refried beans (pinto or black)**
taco meat
fried egg
cheese
salsa
cilantro (optional)

1.  fry egg, while egg is frying, heat up the beans, meat and tortilla (I didn't have any refried beans so I quickly 'refried' myself some black beans)**
2.  layer tortillas with beans, meat, and egg on top.  Top with cheese, salsa and cilantro....


**Refried Beans
1 can of black or pinto beans drained
cumin
salt
butter or bacon fat (optional)

1.  Heat up skillet and melt butter (if using), add beans and mash, season with cumin and salt to taste...


just a fast easy different way to serve up eggs for breakfast...or lunch...and to use up any leftover beans and meat...

*oh...and for those wondering
Huevoes Rancheros is Spanish for "rancher's eggs,"
huevos, pl. of huevo, egg + American Spanish rancheros, pl. of ranchero, ranch-style
although the more common translation is "country" or "country-style" eggs...

I think it means...delish!

Tuesday, February 8, 2011

who makes waffles before checking to see if they have syrup?

me...yep...
and not mix waffles,
 but whole wheat, from scratch, low fat, applesauce waffles...
and not until the first batch is out of the waffle maker do I realize that there is NO syrup in the house!

husband's solutions...eat waffles with jelly...so, yea that would have worked....
but I remembered in the recesses of my brain that I had a chocolate syrup recipe somewhere....

and now my kids are singing my praise...
maybe not out loud, but in their heads they are....I'm sure of it!
because mom let them have chocolate syrup on their waffles!

and bonus just omit the cocoa and you have vanilla syrup...

Homemade Chocolate Syrup
1 1/2 cup sugar
1/8 cup cocoa
1/2 can (6 oz) evaporated milk
1 Tbs vanilla
1/4 cup butter

In a heavy bottomed, tall pan, mix sugar and cocoa.  Stir in milk and heat to a gentle boil, stirring.  Add vanilla and butter, DO NOT STIR, let gently boil for 2-3 minutes.  After butter melts, remove from heat and stir butter and vanilla in.
top your favorite waffle or pancake...or ice cream...
or just eat with a spoon...probably not recommended...but it is that good!

Homemade Vanilla Syrup
1 1/2 cups sugar
1/2 can (6 oz) evaporated milk
1 Tbs vanilla
1/4 cup butter

In a heavy bottomed, tall pan, mix sugar and milk, heat to a gentle boil, stirring.  Add vanilla and butter, DO NOT STIR, let gently boil for 2-3 minutes.  After butter melts, remove from heat and stir butter and vanilla in.

one batch is more than enough for a few breakfast worth of waffles...
bonus...you can either double a batch or make a batch of each chocolate & vanilla from one can of evaporated milk...

double bonus...you can make this syrup twice a sweet by adding a cute little kitchen helper

you don't think his teacher minds that he had more than his share of vanilla syrup before school this morning...she hasn't called yet, so far so good!

Sweet-n-Sour Beans

this is an old family recipe...
well, maybe not old...but it's a recipe that I have found memories of from childhood and make it for my family and they love it...

it's a fast one to throw together with stuff you usually have in the pantry and you can 'ad-lib' the recipe a bit...
and it also does well in the crock pot...
it can be a main dish or a side...
beef or vegetarian....

love the versatility of this recipe...

Sweet-n-Sour Beans
1 lb ground beef (optional if you're going the vegetarian route!)
1 onion chopped (optional)
2 stalks celery chopped (optional...I just forget these sometimes...so focused on the beans)
3-5 cans of beans*, drained and rinsed,
1 can diced tomatoes
1 cup ketchup
1 cup packed brown sugar
1 cup vinegar
water

brown the ground beef with the onion and celery in a medium pot, drain. (or put into crock pot)
add the rest of the ingredients, may need to add a can or two of water depending on the consistency you want...I prefer a heartier recipe so I don't usually add any...
stir and bring to boil, simmer for about 20 minutes before serving...you can cook for longer...the longer the better the flavors will be.
or in the crock for as long as you need...high for 3 hours, low for up to 10....

* use all or a mixture of what you have in your pantry or what your family likes...
I usually chose based on color, the more variety the better, this is the norm...1 can kidney, 1 can black, 1 can white (great northern or white kidney), 1 can green beans
other options are pinto beans, garbanzo beans, butter beans, black eyed beans, etc...I would steer clear of any bean that has been flavored like a chili bean...

~this is great with cornbread for dinner
~as a side at a bbq or potluck
~with meat/without meat this is hearty and filling!

Monday, February 7, 2011

BBQ Chicken Sandwiches

love an easy chicken dinner with less than 5 ingredients?

and that makes your house smell delish....

BBQ Chicken sandwiches
1 whole chicken (you can use breast or any other chicken pieces that you want)
favorite BBQ sauce (or the one that's in your fridge)
sweet peppers (optional)
rolls
cheese

Rinse off the chicken and get rid of all the gross nasty stuff they put inside...why do they do that...does anyone actual use the neck anymore???
cut off tops of peppers if using them and clean...
place chicken and peppers in crock pot
pour BBQ sauce over the top

high for 5 hrs, low for 8

carve and shred chicken and toss with more BBQ sauce
place on warmed rolls and top with slice of cheese (we used swiss)
....
devour!
sorry I didn't get a better picture, I was hungry and had been smelling the chicken all day...so I snapped a quick pic and gobbled it up...I had plans to take a picture of the chicken all shredded before it went on the rolls...but that also didn't happen...

I've said it before...I think...
but a whole chicken in the crock pot is amazing...real moist chicken and so very tender...I think this bird was in the crock for almost 10 hours and I was worried it was going to be dry, it was fall off the bones tender and melted in our mouths...so good...
I went to make a sandwich the next day with the leftovers and the husband had almost finished it off!

Monday, December 20, 2010

Easy Christmas Cookies VI

I was only going to post 5 recipes for the Easy Christmas Cookie Challenge...
but I made this one yesterday and it was so super easy...
and I'm pretty sure it taste good*...I have a major head cold and can't taste anything right now...

anyways...this post was inspired by a fb friend Nikki...we went to school together, pretty sure almost all 13 years...those early years are foggy for me!...anyways...Nikki said that one of her favorite Christmas cookies are peanut butter cookies with a Hersey Kiss in the middle...
we've all seen them...
we've all eaten them...
but for some crazy reason I've never made them...


so yesterday...
when the whole family was taking their Sunday Afternoon nap
and I had taken some version of a 'non-drowsy' cold med and was so tired, but WIRED I decided to try to bake up a batch of these easy cookies.

you can of course use any peanut butter cookie recipe that you have on hand, probably even use a store bought dough...
but to stick to my challenge I found a peanut butter cookie recipe with less than 5 ingredients....
it also has NO flour...for you gluten free peeps out there!...not sure if peanut butter is gluten free...or Hersey Kisses for that matter...


Hersey Kiss Peanut Butter Cookies
1 c. peanut butter, smooth or crunchy (I used crunchy)
1 egg
1 tsp. vanilla
1 c. sugar
Hersey Kisses (about 2 dozen)

Combine all ingredients except for Kisses. Drop by spoonful into lightly greased cookie sheet, I again used my Pampered Chef mini cookie scoop thing...love it.  Press an unwrapped Hersey Kiss into the middle of your cookie balls. Bake at 350 degrees until done (about 5-7 minutes).  Let cookies cool before taking them off of the cookie sheet, they are pretty crumbly until they're cool...I covered my cookie sheet with a sheet of parchment paper (or wax paper) and then just pulled the sheet off to cool on the counter.
Makes about 2 dozen cookies....and you can put a lot on a cookie sheet because they don't spread during baking.
just had to post the picture again...don't they look so cute...got me thinking that you could make like sugar cookies and use the red and white striped kisses they have out right now and make them look like sleeping elves or something...

*as for taste...like I said, my taste is gone right now because of a lovely head cold...
and when I asked my family how they tasted all of them said...at different times...
"...they taste like peanut butter...."
really, really...so I make a cookie with peanut butter as the base, call it a peanut butter cookie...and it taste like peanut butter...shocking!
they all did eat more than one...so that had to be good!