Showing posts with label sewing. Show all posts

Thursday, December 8, 2011

if the shoe fits

...or sock...
and it's more like if the sock DOESN'T fit....

I made our (my Beau & mine) Christmas stockings 14 yeas ago...
and I guess the style back then was ugly...
or something close to that!

I've hated our stockings for about 10 years now...
not sure I ever really loved them...
but full on HATED for quite awhile!

this is how attached we were to our stockings...we couldn't even remember from year to year who's was who's...I think we settled on mine being the lighter one and his the darker...but I'm not sure it that was the original assignment!

anyways...off to the fabric store...
and I found some fabric that I LOVED...

oh, so pretty!...just a little Christmas decorating tip...don't get stuck in the Christmas fabric section...
rather than the ol' snowman/Christmas tree/Santa/candy canes/reindeer
decide what color scheme you want and look for fabric in those colors....
I wanted to stick with the green theme because of the tree skirt I made last year...
but also wanted it to not be too green....
I also like texture and corduroy is a favorite of mine...so I found our pattern fabric first and then off to the corduroy to match up colors...
I didn't end up using the polka-dots...might make a table runner with it...we'll see.

I traced our old stockings
adding more curve to the heel because it felt too straight

cut them out...
measured for the cuff

sketched out the toe and heel

printed off initials for them (so we can remember which one belongs to who (or is it whom?)
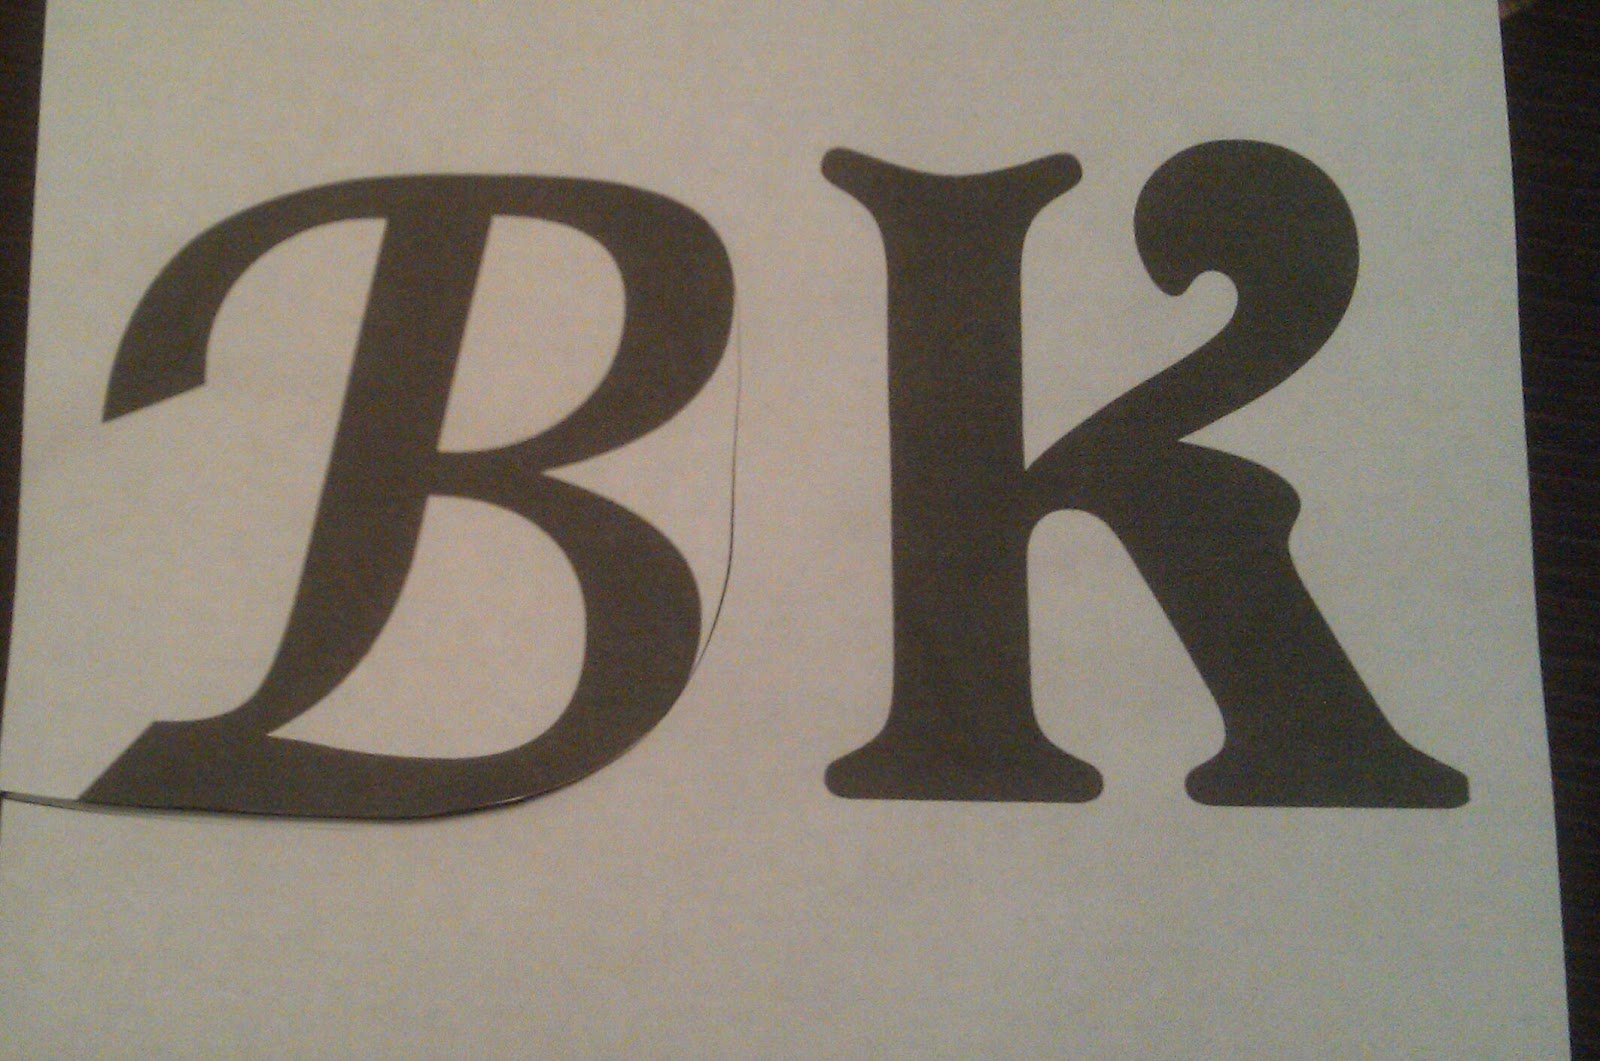
the 'B' is Lucinda Calligraphy and the 'K' is Victorian LET 
cut them out
and then cut the heel, toe and initial out of the contrasting fabric

you will need 2 toe's and 2 heels,
(make sure to label them and draw an arrow for the top of them because they are both slightly football'esq shapes and look a lot alike once they're cut out!)
only one initial is needed unless you want one on both sides
and make sure to cut the initial out backwards (well, if you're cutting out on the wrong side of the fabric!)

the stripe fabric on mine is leftover from our tree skirt last year
the pattern fabric on Beau's is also on our tree skirt but I had to buy more
cut it all out...
sew them all together...

which I'm not quite done with yet...
I like our stockings to have a little more body to them 
so I wanted to line them and have them padded.
and I didn't have material for the lining...
so off to the store for more fabric 
and then I will finish them up today...
I'll update this post when I have them all done....
...to be continued!

AND
Done!

and because I'm not a real seamstress...
I just play one on my blog
I can in no way walk you through getting from
this 


to this

I can tell you there was some seam ripping/frustration/under the breath mutterings that all happened but I'm not sure that is needed to get to the final product...

Wednesday, December 8, 2010

Greenish Circle!

that was my goal...and I think I got it!

I have had the same Christmas tree skirt for awhile, can't even remember when...maybe 10 years?

anyways, I got it 1/2 off after Christmas one year, when the selection is NOTHING...so I was probably settling on something that I wouldn't have chosen in the 1st place...but those skirts are crazy expensive!

so last year, while packing up the Christmas stuff I left the tree skirt out to use as a pattern for a new one...and I would do it in like February...or March...I wasn't wanting to use Christmas material so I didn't need to wait until August when it all hits the shelves....
so there the skirt sat in my laundry room/sewing pile of stuff...and I'd move it from pile to pile while organizing or looking for something...
and then the week before Thanksgiving I decided it was time...
I only  had 3 major requests of the end product
*greenish...I was ready to change it up, the previous skirt had been navy blue
*circle-roundish form
*Christmasy and festive without using Christmas material....

I'm not going to give you a step by step...
well, because it'd would be embarrassing at how BAD I really am at sewing...I just pretend I know what I'm doing...and with that head-in-the-sand outlook I make projects with using patterns!

here is a glimpse of the process....
cut these all out only to realize that I didn't have enough...now off to find a different fabric to match and pull it all together...oh, and that's when I realized I also wanted something on the back....

 end product...don't mind the 'Littlest Pet Shop' toy in the corner...

ties on the back portion and a peek-a-boo at the underside fuzzy green...

so I did it...it's a greenish-non-Christmasy circle tree skirt!
tree skirt in action!

Wednesday, October 6, 2010

just some projects here and there

okay so I realized that I've been really bad about posting projects that I've worked on...
here are some ChambersMade projects from the past few months!

some sewing projects 

I never made the boy child a baby blanket...
I had 5 other friends that had babies that year and after I was done making blankets for all of them...
and was 9 months pregnant in July...
I figured that I had enough blankets for him and didn't need to make him one...
but I always felt a little bad so finally I made him a bedspread for his bed...
5 years later!
...it's not actually done, and this picture is before I even started sewing it, the front is all sewn together, I just haven't found what I want for the back, so it's just the front...but it's on his bed and he likes it!


here is a monster blanket I made for a new baby in our church...the kids drew monsters and I tried to duplicate them as best as I could in fabric form...it was a fun project...I want to make more monsters!


a dress I made for the girl child for some family pictures...family pictures that I have yet to order..yikes!

some painting projects
these signs were all ones that were ordered from a lady at a local boutique, she's selling them in her shop...let me know if you'd like a custom sign, I'll let you know my prices...


 Lulafaye is the name of her shop


 the backdrop that my friend Kim-o-Lee and I painted for VBS (Vacation Bible School)
misc other things
 a camo cake for a friend's son...
a necklace that Mrs. Smith and I made for a Sunday School teacher that stepped down after teaching for 6 years...we miss Ms. Rachel!

lots of fun projects this summer...I know I have other stuff, but just didn't take pictures...now off to paint and sew for next weekend's "Green Baby Expo"...lots of fun!

Wednesday, May 5, 2010

I Don't Need no Stinkin' Pattern

Okay...here it is...the easiest skirt E.V.E.R....

I made this in less than an hour...
with no pattern...
and I even had to replace the needle on the sewing machine, re-fill the bobbin, and answer the phone a few times!

Step 1...measure the girl child...waist, hips, and length that you want the skirt...

Step 2...some math...
measurement 1-two pieces...take the larger measurement of the hips and waist...my daughters was the hips...31...divide by 2 and round up so 31 / 2= 15.5=so 16...then add 5...16+5=21...this is the length of the two smaller pieces of fabric at the top (length is totally up to you, do you want the three layers even or not...take your length measurement and divide it by 3 or whatever you want to get the look you want...and cut the fabric that width...don't forget to add about 2 inches for the waist on the top piece...
I wanted the skirt to be around 17 inches inches long but I also wanted the skirt to have a larger middle layer and the top and the bottom to be two different sizes...so I decided to have the middle one about 10 inches and then the top one about 3...plus 2 for the waist and then another 1 for seam allowances...so my top pieces were 6 x 21-cut two of these...
2nd Measurement-two pieces...the next length just add 5 inches to your last length...so 21=5=26...and I wanted this one to be 10 inches wide...plus seam allowances so cut two pieces 11x26...
3rd and final measurement-two pieces...add another 5 inches to your length measurement 26+5=31 and I wanted the length to be close to 17 inches I have 3 at the top 10 in the middle...13 is what I have so far so another 4 inches to get my desired length, plus an inch for seam allowances=5...so 2 pieces cut 31x5

okay was that totally confusing...I hope not...
now I have 6 pieces of fabric, 
2=6x21
2=11x26
2=5x31
have fun with the fabric also...choose all one type, two different patterns, or three different patterns...you could have up to 6 different fabric patterns since you have 6 panels of fabric...have fun and let the girl help you decide...these were some fabric pieces I had bought to make an apron and haven't made the apron so rather than take the girl fabric shopping (that would have been H.O.U.R.S...she has the same problem in fabric stores that her mother and grandmother have...it's genetic!), I had her "shop" in my fabric piles...

Step 3...sew the panels of the same measurements together into large circles...
okay...this is where me not reading/following patterns is going to hurt YOU...I really don't have the sewing vocab down to explain what I did...or how I did it...oh, and I was too busy changing needles and re-filling the bobbin to remember to take pictures...so sorry
on the 6x21 panels sew the 6" sides together on both ends so you end up with a 6" x 41" (you loose some inches for seam allowances) fabric circle...
sew the 11x26 panels together to have a 11x51 circle (sewing the 11" sides together)
& the 5x31 panels to have a 5 x61 circle...

Step 4...sew two basting seams around the top of the larger circles...
these are used to gather the material up so you can have some ruffles in the skirt and so the two sizes will match...you can't sew 51" to 61" so the 61" length needs to be gathered together until it measures 51"...(this is were I placed a lifeline call to the mom to remember how to gather...)...and the 51" will need be be gathered to match up with the 41"...
you grab the bottom bobbin threads and just gently pull them and your fabric will start to gather...then you can gently move the gathers deeper into the fabric...

Step 5...pin the bottom circle to the middle circle, matching up the gathered side of the 61" to meet the bottom side of the 51"...sew with back sides of the fabric together...this will give you a fun, messy look, if you don't like the look, sew with the right sides together and you will have a cleaner look)
I remembered to take a picture...
sew the middle circle to the top circle...

Step6...fold down and iron the top to make a waist band, sew it leaving an opening to slip the elastic into...measure the girl again and cut the elastic about an 1/2 inch smaller than her waist (or wherever she wants the skirt to rest)...using a safety pin thread the elastic into the waist band and sew the pieces together at the end...
sew up the opening of the waist band...and Ta Da...your skirt is finished!!!

oh...I also left the bottom un-hemmed to add to the funky style, but I did sew a line around the bottom about 1/2" up to prevent it from fraying too much...

Tuesday, May 4, 2010

The Girl Needs Bottoms!

to wear that is...
our sweet little girl is...well, she's not as little as she once was.
the girl has always been long and skinny...I believe that the adjustable waist pants were invented for our tall thin child...
and then...
and then she got her tonsils out last August and thus began the 9 month meal!

the girl had apparently been starving for the past 8 years 9 months...
tonsils removed and the feast began...
and her little body became a healthy body...
GREAT....WONDERFUL...FINALLY...
except that this momma likes to buy clothes at the end of the season for the next year...getting those $15 shorts for $0.97!...but our little girl went up two sizes over this past winter and all the clothes I bought for her at the end of last summer to wear this summer are now useless...

so I had to come up with a way to stretch some extra life out of some clothes/items already around the house...
here are 4 creations...
one is totally from scratch and the other 3 are upcycled pants...

skirt 1...totally from scratch...I plan on doing a tutorial later this week or next on this simple skirt...took me less than an hour to make with no pattern.

shorts 1-a pair of cargo pants that the girl never wore I just cut off, cuffed up and hemmed...I might be adding some cute buttons on the side pockets to girlie these up...

Shorts 2-cute pair of jeans that had the word LOVE down the side that she never liked...but liked the flowers...so I upcycled them into shorts...will post a tutorial later this week on how to make the cuffs on these.

Skirt 2-jeans that I cut off and then cut the legs open and added bright fun panels to turn into a skirt...a tutorial for these will also be in the near future!

apologies for the headless girl...she was not in a picture mood this morning and I really just wanted to get the images of the projects up...so I told her that she didn't have to smile or even brush her hair!

I'm linking this to Nifty-Thrify Tuesday
 http://linda-coastalcharm.blogspot.com/
and to Transform Tuesdays


Monday, February 22, 2010

Sew, it Finally Happened


I've had a few sewing projects that I wanted to conquer and I was able to sit down today and finish two, YES 2, aprons...

here is a little story about my aprons, with pictures even...

The first apron I made, Apron A, started out with a pattern...
you might not know me, but I don't do patterns...
but I figured that since I'm really not a pro at sewing I'd take a crack at what professionals (aka: the pattern makers) say I should do...But then I started reading the pattern...something that they need to offer college level courses in how to read...and after a little bit of confusion, decided that I wasn't thrilled with how they wanted me to do the pockets, I sort of felt it was a HUGE waste of material (material = gold in ChambersMade land)...so smart little me decided to ...modify...the pattern...the pattern that I wasn't completely sure that I was reading correctly in the first place...and after my "mod'ing" and a few frustrating moments I finished my apron, and realized that my frustrating moments could have been avoided had I just followed the pattern like I was supposed to...but it turned out and I saved a ton of gold...I mean material...

...so I discovered if I take my own pictures in the mirror
 the flash flashes out my face so no need to crop the pic, 
but I must remember to wash my mirror next time...
so I think it turned out okay,
things I didn't like
* how high the pockets were
* I wanted the waist band to be thicker
* it didn't wrap around my waist and thighs as much as I wanted

...so now that I've mod'ed the pattern why not just totally throw the whole pattern out the window and make a new one...
so new, but very similar pattern...
* I used the same base, but just cut it about 2 inches wider all around
*cut the waist band and ties twice as thick (6 inches, that will be folded in half = a 3 inch waist and ties)
*decided to go with just one pocket and place it down lower on the apron (my problem last time was dealing with the pocket, bias tape, and waist band...so not having the pocket up by the waist line elliminated the entire problem!)

I want to stop right here and thank my friend Rayna for introducing me to Bias Tape...I am now in love.  I'm also sure that at some point in my life my mother tried to teach me the finer points of Bias Tape and I didn't pay attention, so sorry mom!  When trying it on my own on an apron I made last year, I become totally frustrated and just decided that it was not needed, then Rayna showed me how using an iron with the bias tape will change your life...thanks for that life changing lesson Rayna...

adding a little heat will allow you to mold the bias tape anyway you want !  magic!

My finished project...I really wanted to give you all the steps, but I'm a beginner sewer...
(not a word right?...think seamstress is the right word)... and feel that trying to walk you step by step through a project that I threw the pattern directions out the window on, would be the blind leading the blind...probably more like the blind and deaf leading the blind.....
but here is my apron, Apron B... thicker waist band, wider overall apron, covering more of my waist/hips/thighs, and only one pocket!

lessons learned today...
*don't "mod" a pattern until you know what you're doing
*bias tape is my friend
*taking pictures in the mirror with the flash on allows me not to stress over how bad I will look in a picture
*wash my bathroom mirror before taking pictures!

that's the story of two aprons...and I really did make both of these today!  I can hardly believe it myself.
...and YES, my family had a home cooked meal, with vegetables and everything!
And the boy child even got a bath!
and YES, it's past my bed time...good night!

blog edit...or add on...
after a good nights sleep I re-read my blog and looked at the pictures and you can't really see how cute the material is, so here's a closer look...


it's a blue with coffee beans (brown) and then a cream with a pretty brown pattern and teeny tiny blue hearts every once in awhile.  so cute!